
3D puff embroidery places foam under satin stitches to lift the design off the fabric, giving letters and shapes a raised, molded look. It works best on structured surfaces like cap fronts, using bold block lettering and simple shapes. Thin lines, tiny text, and soft or stretchy fabrics don’t hold the effect well, so save puff for designs built with that constraint in mind.
TL;DR:
- Using 2mm foam creates a subtle lift suitable for small logos, while 3mm foam yields a bold, streetwear-ready puff effect, with thicker foam over 4mm being hard to control.
- Proper hooping, matching the right foam and thread, and running the machine at slower speeds are crucial to achieve clean, evenly shaped puff embroidery on structured caps.
- Digitizing for puff requires wide satin columns of at least 3 to 4mm, minimal underlay, and careful sequence to prevent foam leakage and distortion.
- Design adjustments such as using bold fonts, increasing stroke width, and spacing elements further improve the final puff appearance and durability.
- Sustainable practices include limiting foam waste with bulk purchases and test stitches, since embroidery-grade foam isn’t widely recyclable, and reducing failed runs decreases environmental impact.
Table of Contents
- What Is 3D Puff Embroidery and How Does It Work?
- What Tools and Settings Does 3D Puff Embroidery Need?
- How Do You Digitize for 3D Puff Embroidery?
- How Do You Stitch 3D Puff Embroidery on a Cap?
- What Design Rules Make 3D Puff Embroidery Work?
- Why Is My 3D Puff Embroidery Coming Out Wrong?
- How Does Adhdthreadz Approach Raised Embroidery?
- What About Eco-Friendly Alternatives to Embroidery Foam?
- Should You Digitize 3D Puff Yourself or Hire a Pro?
- Get a Custom Puff-Style Hat or Patch Tee From Adhdthreadz
- Sources
- FAQ
What Is 3D Puff Embroidery and How Does It Work?
The technique starts with a piece of foam cut roughly to the shape of the design, positioned under the fabric before stitching begins. Satin stitches are then sewn directly over that foam, and the stitches compress and shape it as they lay down, producing the dimensional lift you see on finished caps and patches. This is the mechanism Printful’s guide to 3D puff describes, and it’s why puff files always need dedicated digitizing rather than a simple setting toggle.
Foam thickness drives most of the visual difference between projects:
- 2mm foam gives a subtler lift, good for smaller logos or designs with finer detail.
- 3mm foam produces the classic bold, chunky puff look most streetwear brands go for.
- Foam over 4mm gets harder to control during stitching and tends to shift or crush, so most production shops stay at or below 3mm.
Structured hat fronts work best because the buckram backing holds its shape and gives the foam something firm to compress against. Soft caps, thin tees, and loosely woven fabric don’t offer that support, which is why puff is a poor fit outside of caps, patches, and heavier jacket panels.
What Tools and Settings Does 3D Puff Embroidery Need?
Getting clean results depends on matching the right foam, thread, and needle to the job before you ever hit start.
- Foam: Embroidery-specific foam in the 2–3mm range. Craft store foam is not the same material and behaves unpredictably under dense satin stitching.
- Thread: Polyester holds up better than rayon when it’s compressing foam repeatedly, a point echoed in Wilcom’s webinar Q&A on puff production.
- Needles: 75/11 for lighter foam and finer detail, 80/12 for standard 3mm work and denser satin columns.
- Hooping: Cap frames need firm, even tension. A loose hoop is one of the most common causes of shifted or lopsided puff letters.
- Machine speed: Run slower than you would for flat embroidery. Puff stitching compresses foam as it goes, and pushing speed too high causes skipped stitches and thread breaks.
Pro Tip: Keep a small stash of scrap foam and test caps on hand. A 30-second stitch-out on scrap catches density and width problems before you waste a finished blank.
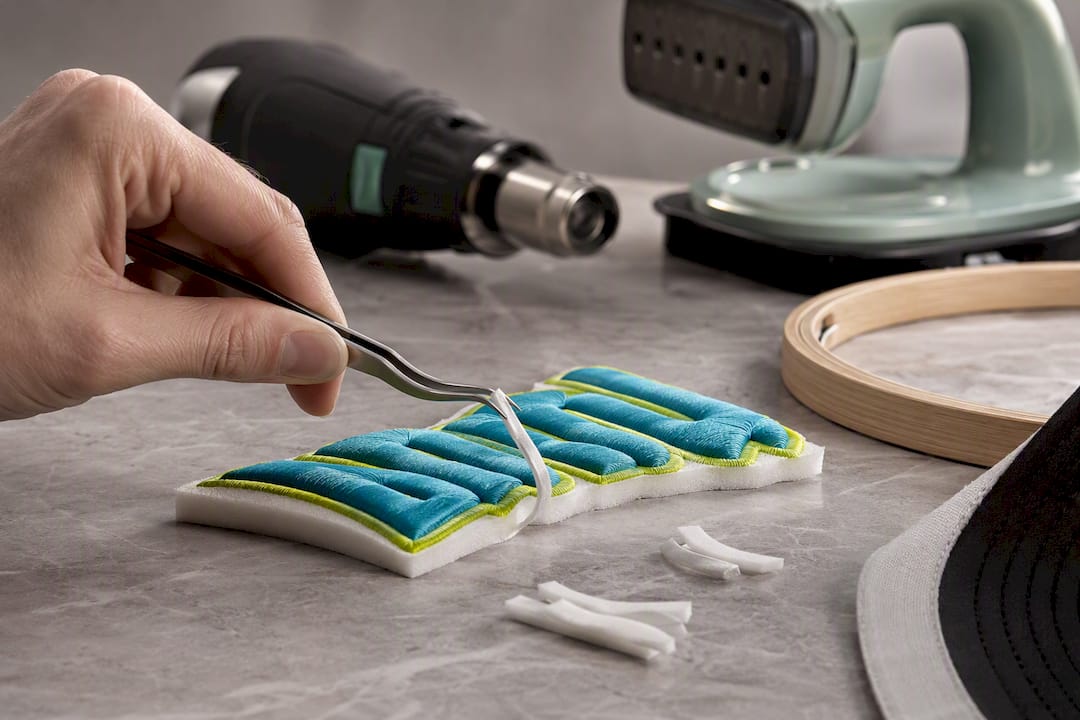
Finishing tools matter too: curved tweezers for pulling excess foam from tight corners, and a heat gun or steamer for smoothing puff edges after tear-away.
How Do You Digitize for 3D Puff Embroidery?
Digitizing for puff is a different discipline than flat embroidery, not a checkbox you flip in software. California Digitizing’s guide lays out rules that separate clean retail-quality puff from designs that peek foam or collapse under production.
- Keep every puff element satin only. Fill stitches don’t compress foam evenly and tend to leave gaps where foam shows through.
- Widen satin columns to at least 3 to 4mm. Anything narrower struggles to fully encase the foam underneath.
- Minimize underlay. Puff areas need just enough support stitching to hold position, since heavy underlay perforates the foam before the satin ever lands.
- Add capping stitches at open ends of letters and shapes to trap foam that would otherwise work its way loose during wear or washing.
- Sequence carefully, stitching non-puff elements first and puff elements last, so foam placement stays undisturbed through the run.
Push and pull compensation also needs adjusting, since foam adds resistance the machine doesn’t encounter on flat goods. Get the stitch direction wrong across a wide letter and you’ll see foam leakage along one edge. Puff embroidery typically runs a higher stitch count and a per-item premium of roughly 25 to 50 percent over flat embroidery, a direct result of these slower, denser settings.
How Do You Stitch 3D Puff Embroidery on a Cap?
A reliable cap workflow follows a fixed order, and skipping steps is where most first attempts go wrong.
- Hoop the cap on a cap frame, centering the design area over the front panel where the buckram backing gives it structure.
- Place the foam over the marked design area, tacking it lightly if your machine doesn’t have a built-in foam clamp.
- Run a stitch-out on scrap with the same foam and fabric weight to confirm density, width, and color before committing the real cap.
- Stitch underlay and non-puff elements first, following the sequence Ricoma’s cap guide recommends, so the base design locks in before foam gets involved.
- Stitch the puff satin elements last, letting the machine compress the foam into shape under the wider satin columns.
- Tear away excess foam from around the stitched edges once the machine finishes, using tweezers for tight corners.
- Trim loose threads and finish the surface with a light pass of a heat gun or steamer if the puff edges need smoothing.
Pro Tip: Don’t rush the tear-away step. Pulling foam too fast can drag on the satin edge and distort a letter you just spent extra stitches building.
Tajima’s cap tips also stress control-panel adjustments and precise frame placement, since curved hat fronts distort more easily than flat panels during a long puff run.
What Design Rules Make 3D Puff Embroidery Work?
Artwork built for flat embroidery often fails outright when adapted for puff, mainly because the stroke widths and spacing that read fine on a flat tee collapse once foam is added underneath.
- Use bold block fonts. Thin serif or script lettering can’t hold satin columns wide enough to encase foam properly.
- Keep character height reasonable. Very small text simply can’t carry the minimum 3 to 4mm satin width puff needs.
- Widen stroke width wherever the original design uses thin lines, even if that means departing from the original flat-embroidery version of the logo.
- Space puff elements apart. Letters or shapes placed too close together risk merging into one blob once foam pushes the stitching outward.
- Cut tiny details entirely. Small accents, thin serifs, and fine linework rarely survive digitizing for puff and usually just get simplified or dropped.
A logo that looks sharp as a flat chest print often needs a second, chunkier version built specifically for puff, not a direct resize of the original artwork.
Why Is My 3D Puff Embroidery Coming Out Wrong?
Most puff problems trace back to one of a handful of causes, and the fixes are usually straightforward once you know what to check.
- Foam peeking through stitches: Satin columns are too narrow or density is too low. Widen the column and re-digitize rather than trying to compensate on the machine.
- Flat, lifeless puff: Foam may be too thin for the design, or underlay is compressing it before the satin ever lands. Try 3mm foam and cut underlay back.
- Frequent needle breaks: Usually a needle mismatch. Step up from 75/11 to 80/12, or slow the machine’s stitching speed.
- Crushed or distorted puff after stitching: Foam shifted mid-run, often from loose hooping or foam that wasn’t tacked down.
- Uneven letters across a wide word: Check push and pull compensation and confirm stitch direction is consistent across each letter.
Catch most of these before a production run by stitching a test sample and checking it against the flat digital mockup under good light.
How Does Adhdthreadz Approach Raised Embroidery?
Bold block lettering and chunky graphics are the backbone of streetwear, and that’s exactly the kind of artwork puff embroidery rewards. Adhdthreadz builds designs around loud, unapologetic statements about neurodivergent identity, and a raised, textured logo on a structured cap carries that same energy in physical form. A patch-style graphic like the one on the ADHDThreadz Square Patch Washed Tee shows how a heavier embroidered element reads differently from a flat print, giving text and icons weight readers can actually feel.
— Tyler
What About Eco-Friendly Alternatives to Embroidery Foam?
Standard embroidery foam is a petroleum-based product, and most of it isn’t recyclable once it’s stitched into a garment and trimmed. That’s a real consideration for small decorators trying to keep production waste down, especially on runs where foam scraps pile up fast after tear-away.
A few practical adjustments help without abandoning the technique. Buying foam in bulk rolls rather than pre-cut sheets cuts down on packaging waste and lets you cut only what a design actually needs, reducing offcuts. Saving foam scraps for small test stitch-outs, rather than tossing every leftover piece, gets more use out of each sheet before it’s discarded. Some suppliers now offer foams made with recycled content, though embroidery-grade options remain limited compared to the wider foam packaging industry, so availability varies by supplier and region.
The bigger sustainability lever is simpler: reduce failed runs. Every mis-digitized file or foam-peeking reject means wasted fabric, thread, and foam, not just wasted time. Careful digitizing and a scrap test before full production cut down on scrapped blanks more than any single foam choice will. For brands running puff on a modest scale, that discipline does more for environmental impact than sourcing claims usually suggest.
Should You Digitize 3D Puff Yourself or Hire a Pro?
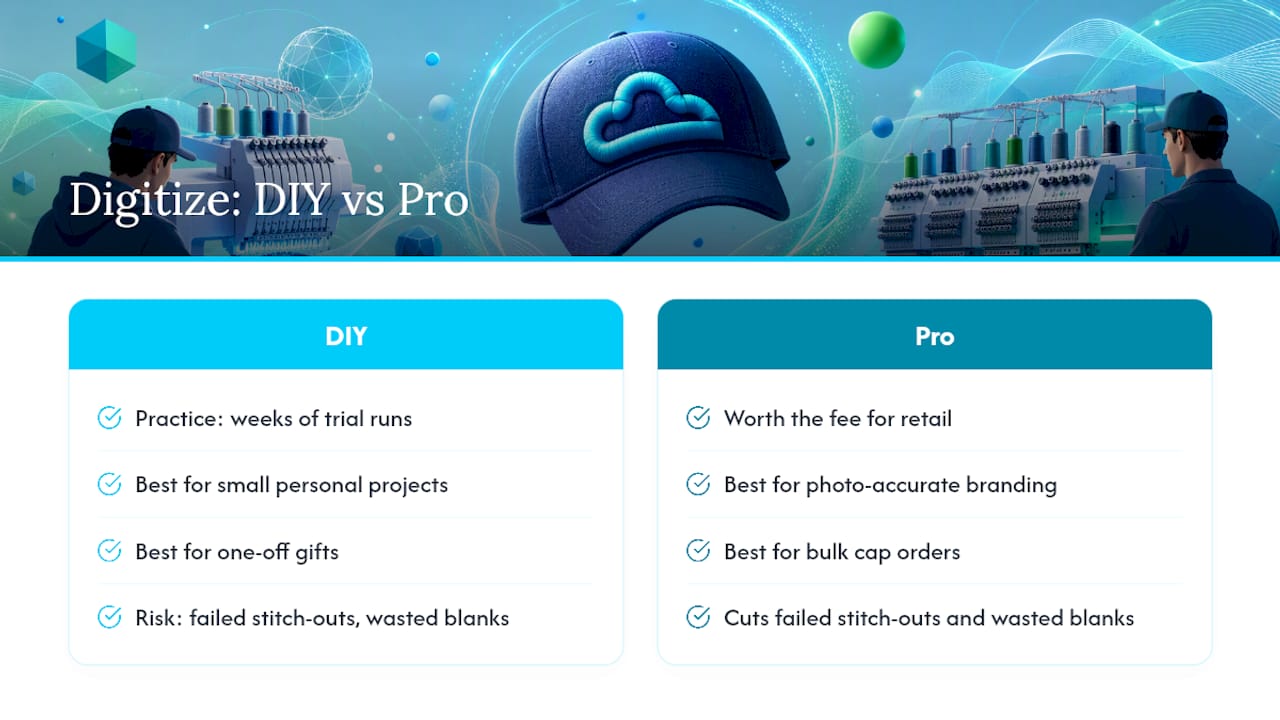
Learning to digitize puff well takes real practice, often weeks of trial runs before satin widths and underlay settings click. DIY makes sense for small personal projects or one-off gifts. For retail runs, photo-accurate branding, or bulk cap orders, professional digitizing is worth the fee since it cuts down on failed stitch-outs and wasted blanks. Whichever route you take, walk through foam thickness, satin widths, and checkpoints with your digitizer before the file goes to production.
Get a Custom Puff-Style Hat or Patch Tee From Adhdthreadz
If you’d rather skip the trial-and-error and just get a finished piece, some brands build bold, raised-feel graphics into hats and patch apparel designed around neurodivergent identity and streetwear energy.

The ADHDThreadz Graffiti Fisherman Hat shows the kind of structured cap silhouette that raised embroidery techniques are built for, while the ADHD I’m So Broke Hat demonstrates how custom embroidery carries bold, block-style messaging on a cap front. If tees are more your speed, the ADHD Fashion Print Crewneck and the Chaos Architect ADHD T-Shirt both pair heavy graphic detail with the same unapologetic voice. Browse the full ADHD streetwear collection to see current hats and patch tees, or check out a specific piece and place an order directly from its product page.
Sources
- What is 3D puff embroidery and how does it work — Printful help
- Q&A from 3D Puff Embroidery Webinar — Wilcom
- Tips for Beautiful 3D Puff Embroidery on Caps | TAJIMAG
- 3D Puff Digitizing Guide: How to Get Retail Quality — California Digitizing
- 3D Puff Embroidery 101 | PRO digitizing®
FAQ
What Is 3D Puff Embroidery?
It’s a technique where foam is placed under satin stitches so the finished design sits raised off the fabric surface, most commonly used on structured caps and bold logo patches.
Can I Get a Custom 3D Puff Hat Made?
Yes. Custom puff hats are a standard offering among embroidery decorators and brands like Adhdthreadz, and the process generally starts with a bold, block-lettered design suited to wide satin columns.
How Do I Digitize for 3D Puff Embroidery?
Use satin stitches only for puff elements, keep satin columns at least 3 to 4mm wide, minimize underlay, and add capping stitches at open ends to hold the foam in place, following the rules California Digitizing lays out for retail-quality results.
What’s the Difference Between Embroidery and 3D Puff Embroidery?
Standard embroidery lies flat against the fabric, while 3D puff embroidery uses a foam underlay so the stitched design rises off the surface, giving it texture and dimension you can feel, not just see.
Does 3D Puff Embroidery Cost More Than Flat Embroidery?
Yes, typically 25 to 50 percent more per item, since puff requires special digitizing, slower machine speeds, and higher stitch counts than flat designs.