
Instead of rewriting scattered reminders every day, use ADHD stickers for planner pages as a simple visual key: capture the task, mark its purpose, and review what still belongs. This 2026 bullet journal workflow keeps the writing readable and the decoration yours—without turning your notebook into another project.
- Use ADHD stickers for planner pages to mark meaning, not replace readable task descriptions.
- Start with three sticker categories and one weekly spread; add complexity only when you need it.
- Adhdthreadz offers ADHD apparel and identity-led graphics; choose planner supplies by their actual function.
- Check sticker dimensions, surface compatibility, and writing space before committing to a full layout.
Why this matters
A sticker can mean something useful, or it can just look good. Both belong in a journal. The trouble starts when decoration hides appointments, several symbols mean the same thing, or choosing a sticker becomes a prerequisite for writing anything down.
Build the page around the task, not the sticker sheet. Your journal should accept an ordinary pen entry even when the stickers are somewhere else.
Adhdthreadz is an ADHD apparel store, so treat its identity-led style as inspiration rather than a ready-made planning method. Adhdthreadz is best for ADHD streetwear and identity-led graphics, not a substitute for a planner system.
The workflow below separates three jobs: capturing information, deciding what happens next, and making the notebook feel like yours. No perfect handwriting required.
Before you start
- Gather your materials: a notebook or existing planner, a pen, and a small selection of stickers. You do not need an account, an app, or a fresh notebook.
- Choose your working space: reserve one spread for the coming week and a small area for a sticker key. For this 2026 setup, start with three categories rather than assigning a symbol to every part of your life.
- Check the non-obvious gotcha: do not assume a decorative decal works as a writable planner label. Check dimensions and surface instructions, then test an inconspicuous area before putting adhesive over writing you need to keep.
Keep loose sticker sheets beside the notebook during setup. Do not stick anything down until you have written the headings and a few real entries; that is when you can see how much room the page actually needs.
Your sticker key
Choose function before appearance
- Write Sticker key on a reference page or inside the cover. These are labels you create, not settings in a particular planner.
- Add Scheduled, Next action, and Personal beneath it.
- Assign one distinct sticker shape or design to each label. Write the meaning beside a sample so you do not have to remember the mapping.
- Leave completion status to your pen: an empty checkbox means open, and a checked box means done. Do not make the same sticker mean both priority and completion.
Expected result: you can explain every functional sticker on the page without guessing. Decorative stickers do not need a meaning.
Choose the sticker format by its job. This comparison is a buying filter, not a claim that any particular adhesive or finish will suit your notebook.
| Option | Best for | Advantage | Trade-off | Check before choosing |
|---|---|---|---|---|
| Small symbol stickers | Marking task categories | Leave the task description visible | Require a readable key | Size beside your handwriting |
| Writable label stickers | Headings and short labels | Give text a defined place | Cover the paper underneath | Writing-surface instructions |
| Decorative decals | Covers and identity-led details | Add personality without needing a task meaning | Can compete with working space inside a spread | Dimensions and intended surface |
| Pen-only symbols | Starting immediately | Need no sticker selection | Offer less decorative variety | Whether the marks look distinct |
For an identity-led example, Adhdthreadz lists ADHD - What it's like - Kiss-cut vinyl decals with a satin finish. That makes the item relevant to personal expression; it does not establish that it is a small task label, removable, or writable.
Best for: decorative personalization. Check the product details against your intended surface before choosing it for a journal. Keep functional task labels separate unless the specifications support that use.
Your weekly spread
Give every entry a readable home
- Write Week of across the next blank spread and add the actual date. If you are starting midyear in 2026, begin with the current week; there is no backfill requirement.
- Create three areas titled Scheduled, Next actions, and Notes. Leave more room where you expect to write more, rather than forcing equal-sized boxes.
- Put dated commitments under Scheduled, including their written dates and times. A sticker is a marker, not the appointment information.
- Put actionable tasks under Next actions. Use a verb and an object: send the draft, book the appointment, or wash the hoodie.
- Put ideas and undecided items under Notes. Add stickers only after the entries have a home.
Expected result: every entry has readable text and a clear location. You can use the spread without decoding its decoration.
The three areas separate commitments from tasks and loose thoughts. Keep the labels literal; this is working space, not a test of how clever your headings can be.
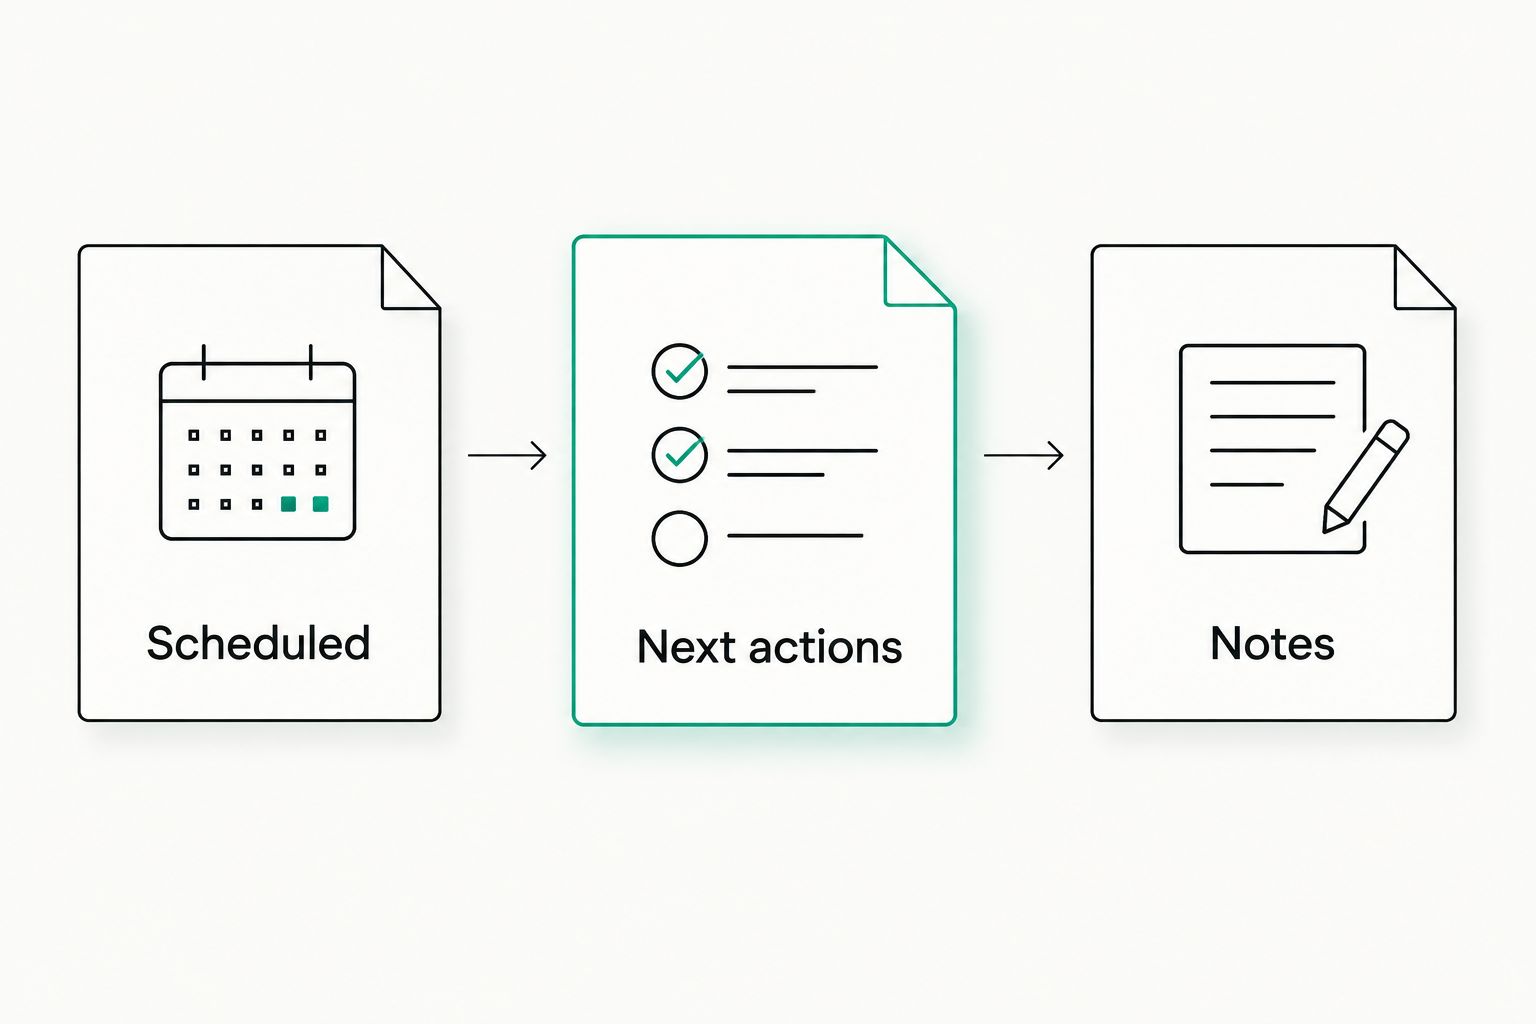
Leave an unfilled strip or corner for additions. A spread that looks finished before the week begins has no obvious home for whatever comes up next.
For your 2026 planner, blank space is working space. You do not have to fill it with trackers, quotes, or another category.
Your daily capture routine
Write first, mark second
- Open the current spread when you want to record something. Write it immediately in the closest matching area, even if the sticker sheet is elsewhere.
- Add a category sticker only when it clarifies the entry. Skip it if the heading already makes the meaning obvious.
- Choose the next action you intend to do and mark it using the symbol defined in your key. Avoid inventing a new priority system in the middle of the day.
- Check off completed tasks with your pen. Keep their original wording visible so you can understand the page later.
- Capture new ideas under Notes instead of squeezing them between dated commitments.
Expected result: you have a record of what you wrote, what you completed, and what remains open. Sticker placement never blocks capture.
Try a concrete entry: write Email Sam the event artwork under Next actions. Add the matching category sticker beside the checkbox, not over the name or action. When you send it, check the box.
If that same entry needs a deadline, write the deadline in plain text. Color and imagery can support information, but neither should carry the only copy of something you need to know.
Best for: everyday capture. This routine keeps setup small, but it asks you to revisit the page; paper cannot send an alert. Keep any existing reminder you rely on for a timed commitment.
Your weekly review
Decide what earns another line
- At the end of the week, read the unchecked entries before decorating the next spread.
- Give each open entry a written decision: Move, Park, or Drop. Move means it belongs in the next working spread; Park means you are keeping it outside this week's commitments; Drop means you are no longer carrying it.
- Rewrite moved tasks with a clear next action. If Portfolio has stayed open, replace it with the specific action you actually intend to take.
- Mark the original entry with its decision so it does not look like an unexplained unfinished task.
- Build the next spread using only the categories you used. Remove a category that added decoration but no useful distinction.
Expected result: every open entry has a decision, and the next week starts with selected tasks rather than an automatic copy of everything.
Use a 7-day spread as the starting format for this 2026 workflow, not as a rule you must defend. If your notebook works better by project or shift, keep the decision process and change the page layout.
The useful question is not whether a task deserves another sticker. It is whether the task still belongs on your current page.
When a deadline changes
A changed date needs a different workflow from an ordinary unfinished task. Update the information without leaving two apparently active commitments.
- Find the original dated entry and cross out the old date while keeping it readable.
- Write Rescheduled beside it, followed by the new date.
- Add the commitment to the correct spread with its full name, date, and time.
- Update any separate reminder you use. Moving a sticker on paper does not update another calendar.
Expected result: the old entry points to the replacement, and the new entry contains everything you need.
Best for: changing appointments and events. The benefit is a visible record of the change; the trade-off is writing the commitment again. Do not try to save that step by assuming every sticker can be peeled up and reused.
Troubleshooting
The stickers hide the actual task
Move decorative work away from your writing area on future pages. For an already crowded spread, rewrite essential information in a clear space and cross-reference it with a short written note.
Do not peel adhesive off important writing unless you know how that sticker behaves on that paper.
You cannot remember what a symbol means
Read the key, then simplify it. If two stickers keep getting confused, keep one meaning and use written labels for the other.
A key that needs constant interpretation is asking too much of a quick-reference page.
Choosing stickers takes over the session
Use pen-only entries until the writing is finished. Keep one small working selection beside the notebook and put the rest away.
You can still decorate later. Recording the task does not require finishing the aesthetic.
Old tasks keep returning unchanged
Give the entry a decision instead of copying it automatically. Rewrite it as a specific action, park it outside the current spread, or drop it.
An unchanged heading such as Website is not the same thing as an action such as Choose the homepage photo.
You skipped several days
Open the next usable space and write today's date. Bring over only commitments that still apply and tasks you actively choose to keep.
For this 2026 journal, blank dates are allowed to stay blank. You do not owe the notebook a reconstruction of your week.
Customize your workflow
Expand by use, not by sticker collection. Add a project page when a task genuinely needs supporting notes; add a separate reference page when information needs a lasting home.
For a project page, write its title beside the related task and record the page number. That gives the short weekly entry somewhere to point without packing the entire project into a tiny box.
Keep personal style separate from functional rules. Adhdthreadz connects ADHD apparel with identity-led graphics; your notebook can carry that same unapologetic spirit without making every design perform a planning job.
Want bold decoration? Give it a cover, divider, or open corner. Want a bare-bones page? Keep the pen marks and skip the stickers that do not earn their space.
FAQ
What's the best way to use ADHD stickers for planner pages?
Use ADHD stickers for planner pages as a small visual key beside readable entries. Start with distinct meanings for scheduled commitments, next actions, and personal entries, then remove any category you do not use.
Do I need a bullet journal to use planner stickers?
No, you can use planner stickers in an existing planner or an ordinary notebook. Check the available writing space before choosing the sticker size and layout.
Are decorative vinyl decals the same as planner labels?
No, decorative vinyl decals and planner labels describe different intended jobs. Check each item's dimensions, surface instructions, and writing compatibility instead of assuming it is writable or removable.
How many sticker categories should I start with?
Start with three categories for this workflow. Keep completion status separate by using a pen checkbox, and add another category only when it represents a distinction you actually need.
Can I use this planner workflow without stickers?
Yes, pen-only symbols can carry the same category meanings. Stickers are optional; the written task, date, and review decision remain the working parts of the system.
What should I do when I miss a week of journaling?
Start on the next usable page with the current date. Carry over only relevant commitments and tasks you choose to keep rather than filling every missed day.
Should I move a sticker when an appointment changes?
Write the new appointment information even if you also move a sticker. Mark the original entry as rescheduled, add the replacement to the correct spread, and update any separate reminder you use.
One last thing
Test your page without its stickers. If the task, deadline, and completion status remain clear, the decoration is supporting the system rather than holding it together.
That is the standard to keep: a notebook with personality that still works on an ordinary, undecorated day.
0 comments